
Sublimation Printing Process: A Step-by-Step Guide
Sublimation printing works by turning solid dye into a gas under heat and pressure, which then bonds permanently with polyester fibers or polymer-coated surfaces. That gas phase is the whole trick: instead of sitting on top of a material like paint, the dye becomes part of the fiber itself, which is why sublimated prints never crack, peel, or fade the way a screen-printed logo eventually does.
It works best on polyester fabrics and polymer-coated hard goods like mugs, metal signs, and phone cases. It does not work on cotton, dark fabrics, or anything without a polymer surface to grab onto, because there’s no polymer for the gas to bond with. Three tools drive the whole operation:
- Sublimation ink, loaded into a compatible printer
- Transfer paper, which holds the printed design until heat releases it
- A heat press, which supplies the temperature and pressure that trigger the gas transition
Once you understand that core mechanism, the rest of the process is really just controlling variables: heat, time, pressure, and substrate prep.
Key Takeaways
Sublimation printing works because heat converts dye into a gas that permanently bonds with polyester or polymer-coated surfaces, producing a print that won’t crack or peel.
| Point | Details |
|---|---|
| Core mechanism | Heat and pressure turn dye into gas, which bonds with polyester fibers or polymer-coated hard goods. |
| Baseline settings | Start around 380 to 420°F, commonly 400°F, with dwell times adjusted for fabric weight and item shape. |
| Material limits | Cotton, dark fabrics, and uncoated hard goods won’t take a visible sublimation print. |
| Cut-and-sew advantage | Printing flat panels before sewing avoids white seam lines on all-over jersey designs. |
| Test before production | A single test strip on scrap material catches temperature and pressure problems before they ruin a batch. |
Ready to put a cut-and-sew sublimation process to work on your own team’s uniforms? Get a free custom mockup within 24 hours from Caprasport’s design team, or explore the full range of custom team uniforms built with factory-direct pricing and no minimum order requirements. Teams needing embroidered add-ons can also pair a sublimated uniform with custom patches for letterman jackets or warmups.
Table of Contents
- How Does the Sublimation Printing Process Work Step by Step?
- What Materials Work Best for Dye Sublimation Jerseys?
- What Equipment Do You Need for Sublimation Printing?
- How Do You Prepare Files for Sublimation Printing?
- What Temperature and Pressure Settings Does Sublimation Require?
- Where Does Sublimation Printing Work Best, and Where Does It Fall Short?
- Sublimation vs. Screen Printing, DTG, and Heat Transfer Vinyl
- How Do You Fix Common Sublimation Printing Mistakes?
- How Capra Sports Applies Sublimation to Team Uniforms
- Where to Learn More About Sublimation Printing
- Why Beginners Overcomplicate the Sublimation Process
- Sources
- FAQ
How Does the Sublimation Printing Process Work Step by Step?
Getting from a digital design to a finished, wash-proof print takes seven steps, and skipping any one of them is where beginners lose money on wasted blanks.
- Prepare your artwork. Design at 150 to 300 DPI, work in a mirrored orientation if your software or printer doesn’t flip it automatically, and set your file to the correct color mode for your RIP software.
- Print onto sublimation transfer paper. Use a printer loaded with genuine sublimation ink. The image will look washed out and faded on the paper itself. That’s normal. The color hasn’t developed yet.
- Handle the print carefully. Sublimation ink smears if it gets damp or is rubbed before pressing. Store printed sheets flat, away from moisture, until you’re ready to press.
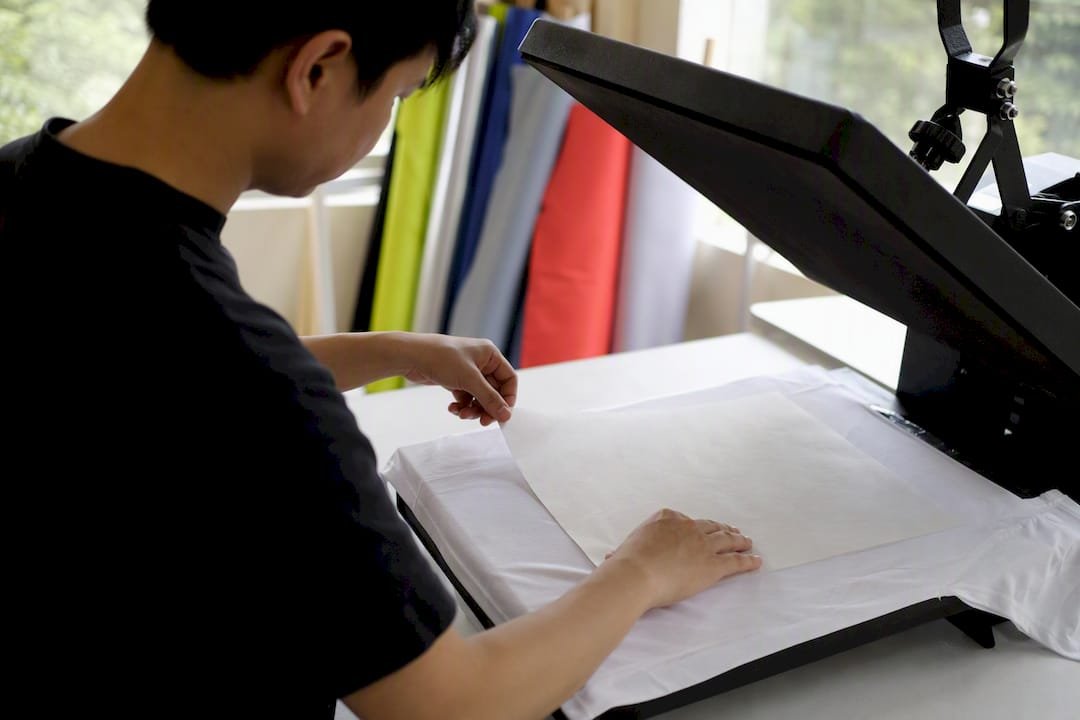
- Pre-press the blank. Run the garment or hard substrate through the heat press alone for a few seconds before applying the transfer. This step removes residual moisture and wrinkles that would otherwise show up as pale patches or creases in the final print.
- Align and secure the transfer. Position the paper ink-side down on the substrate, then lock it in place with heat-resistant tape at two or more edges so it can’t shift during pressing. Slip a sheet of protective (butcher) paper over the top to keep ink off your platen.
- Heat-press at the correct settings. This is where temperature, dwell time, and pressure all have to line up. Practitioner guides for athletic jerseys commonly land around 385 to 400°F for 55 to 65 seconds, which lines up with the wider industry range of 380 to 420°F used across most polyester goods.
- Peel and inspect. Most sublimation transfers are designed for a hot peel: remove the paper immediately after pressing while it’s still hot, in one smooth motion. Check the print for even color, no white creasing, and full coverage before moving on to the next unit.
Pro Tip: Run one test print on a scrap piece of your actual substrate before committing to a full batch. A five-minute test strip catches temperature or pressure problems that would otherwise ruin a dozen blanks.
The general transfer workflow holds for everything from t-shirts to ceramic mugs. What changes is dwell time and pressure, not the sequence itself. If you’re producing team jerseys with all-over designs, note that cut-and-sew production reverses steps 4 through 7: you print and press the flat fabric panels first, then cut and sew the garment afterward. This avoids any crease lines forming along seams.
What Materials Work Best for Dye Sublimation Jerseys?
Not every fabric or surface can take a sublimation print, and understanding why saves you from ordering the wrong blanks.
Polyester content is the deciding factor. Most experienced printers treat 100% polyester as the gold standard, though many “poly blends” with 65% polyester or higher can still take a usable print. Below that threshold, color starts to look washed out and uneven, because there isn’t enough synthetic fiber for the dye gas to bond with. The remaining cotton content simply doesn’t accept the dye at all, so it stays white while the polyester threads around it take color.
Hard substrates work through a different mechanism. Mugs, metal panels, phone cases, and similar items are coated with a thin polymer layer specifically so they can accept sublimation dye the same way polyester fabric does. No coating means no bond, no image.
A few material rules matter for beginners:
- Dark and natural fibers won’t work. Sublimation can’t print white, and it produces no visible result on cotton, wool, or dark-colored polyester, since there’s no light base for the color to show against.
- Fabric weight changes vibrancy. Lighter, tightly woven polyester generally produces sharper, brighter results than heavier or looser knits.
- Finish affects wash durability. Moisture-wicking performance fabrics, common in athletic wear, tend to hold sublimated color exceptionally well because the dye lives inside the fiber rather than on a surface coating that could wear off.
- Uncoated hard goods are a dead end. Buying a blank mug without checking for a sublimation-rated polymer coating is one of the most common first-time mistakes.
What Equipment Do You Need for Sublimation Printing?
Your equipment choice depends entirely on volume. A hobbyist doing a dozen prints a month has completely different needs than a shop running hundreds of jerseys.
Printers fall into three tiers. Converted entry-level inkjet printers are cheap but inconsistent over time. Dedicated sublimation printers, built for the ink from the factory, offer more reliable output for small businesses. Industrial wide-format printers handle high-volume, roll-fed production but represent a serious capital investment.
Sublimation ink must match your printer. Using standard inkjet ink in place of sublimation ink produces a print that looks fine on paper and does nothing on fabric, since regular ink lacks the disperse dyes that convert to gas under heat.
Transfer paper isn’t one-size-fits-all either. Papers vary in coating weight and release speed, and using cheap, uncoated paper often causes ink to bleed or under-transfer.
A working setup typically includes:
- A dedicated or converted sublimation printer matched to your ink
- Sublimation-specific ink cartridges
- Coated transfer paper appropriate for your substrate type
- A heat press with a flat, even platen (uneven platens are a leading cause of patchy prints)
- Heat-resistant tape, protective butcher paper, and a timer
- Heat-resistant gloves, since finished substrates come out of the press hot enough to burn skin
Platen size and flatness matter more than most beginners expect. Consistent heat and pressure across the entire surface is what separates a clean, even print from one with faded corners or ghosted edges.
How Do You Prepare Files for Sublimation Printing?
Clean file prep saves you ink, paper, and rework, and it’s the step most beginners rush through.
Work at 150 to 300 DPI depending on print size. Larger designs viewed from a distance, like a jersey graphic, can get away with lower resolution than a small, detailed logo. Design in RGB rather than CMYK, since most sublimation workflows expect RGB input and convert it through a color profile before printing.
Mirror your image before printing, unless your printer driver or RIP software does this automatically. Sublimation paper transfers in reverse, so any un-mirrored text prints backward on the final product.
For garments with seams, like jerseys, plan your bleed and keep critical text or logos inside a safe zone away from panel edges, since seam placement can shift slightly during assembly and cut off anything positioned too close to the border.
Serious production shops invest in RIP software and color profiling rather than relying on default printer settings. A RIP lets you calibrate color against a specific ink, paper, and substrate combination, which matters because the same file can look noticeably different on two different printers without that calibration step.
What Temperature and Pressure Settings Does Sublimation Require?
Temperature, time, and pressure work together, and changing one without adjusting the others is how prints go wrong.
Baseline numbers to start from: most polyester blanks press well in the 380 to 420°F range, with 400°F as a common starting point. Jersey-specific guides narrow that to roughly 385 to 400°F for 55 to 65 seconds, plus a short 5 to 8 second pre-press to clear moisture and wrinkles.
Heavier fabrics and thicker or curved hard substrates generally need slightly longer dwell times, since heat takes longer to penetrate evenly. Thin, lightweight polyester needs less. Pushing temperature too high to compensate for a short press time is a common workaround that usually backfires: it can scorch fabric or discolor certain coatings instead of just transferring color faster.
Pressure calibration matters just as much as heat. Uneven pressure, often caused by a warped or dented platen, produces prints with faded patches where contact was lightest. Medium, firm, even pressure across the whole surface is the standard target on most heat presses.
The most reliable production habit is running a test strip on scrap material every time you switch substrates, fabric weights, or ink batches, rather than trusting settings that worked last time on a different material.
Where Does Sublimation Printing Work Best, and Where Does It Fall Short?
Sublimation earns its reputation on full-color, photographic, and all-over designs. Jerseys with gradient patterns, mugs with photo prints, and metal signage with fine detail all play to its strengths, because the dye reproduces continuous tone and fine gradients that other methods struggle to match.
Its limitations are just as real. It cannot print white ink, so any white in a design has to come from the base material itself. It produces poor or invisible results on dark fabrics and anything without polyester or a polymer coating. Outdoor and long-term UV exposure can also gradually fade sublimated color over years, similar to how any dyed textile fades in direct sun.
- Best for: jerseys, performance apparel, mugs, metal signage, all-over and photographic designs
- Weak for: dark garments, natural fibers, designs requiring true white ink
- Decision point: cut-and-sew production is required for true seam-to-seam, edge-to-edge designs on assembled garments; standard heat-press works fine for single-panel or centered graphics
Sublimation vs. Screen Printing, DTG, and Heat Transfer Vinyl
Choosing a decoration method comes down to four questions: how the print feels, what it costs at your volume, how much color complexity you need, and what material you’re printing on.
- Feel and durability: Sublimation has no hand at all, since the dye lives inside the fiber rather than sitting on top. Screen printing and heat-transfer vinyl (HTV) both add a layer you can feel and eventually crack or peel; direct-to-garment (DTG) sits closer to the fabric but still applies ink on the surface.
- Cost at scale: Screen printing gets cheaper per unit at high volumes but has setup costs that make small runs expensive. Sublimation and DTG both handle low minimums well, which is a major reason sublimation dominates custom team-uniform orders.
- Color capability: Sublimation and DTG both handle photographic detail and gradients far better than screen printing, which is typically limited by the number of screens (colors) in a design. HTV works best for simple, bold shapes rather than complex art.
- Material compatibility: Screen printing and DTG both work on cotton; sublimation does not. If your project involves cotton apparel, you’ll need an alternative decoration method instead of sublimation.
How Do You Fix Common Sublimation Printing Mistakes?
Most sublimation defects trace back to one of four causes, and diagnosing them correctly saves you from re-pressing blanks that were never going to turn out right.
- Ghosting or blurred edges usually means the transfer paper shifted during pressing. Fix it by taping down all edges before pressing, not just one or two.
- White creases across the print almost always come from wrinkles in the substrate or paper. Pre-press for 5 to 8 seconds to flatten both before the real press cycle.
- Pale, washed-out color points to insufficient temperature, time, or pressure, or low polyester content in the blank. Check your settings against your baseline first, then check your fabric composition.
- Misaligned graphics typically mean the transfer wasn’t taped securely or was placed off-center before the press closed. Use a template or guide marks for repeatable placement.
Run a quick checklist before any production batch: correct mirroring, correct DPI, secure tape, a clean pre-press, and one test strip. Pro Tip: Keep a logbook of temperature, time, and pressure settings for each substrate you use regularly. It turns troubleshooting into a two-minute lookup instead of a guessing game. For long-term print life, wash finished garments inside out in cold water and skip the dryer’s high heat setting.
How Capra Sports Applies Sublimation to Team Uniforms
Most of what separates a good team uniform from a mediocre one comes down to whether it was cut-and-sew or press-on. Cut-and-sew production prints the fabric panels flat before assembly, which is how Caprasport delivers true seam-to-seam designs without the faint white lines that show up when a graphic is pressed onto a garment that’s already sewn together.
Caprasport backs that process with low minimum order quantities, factory-direct pricing, and free samples so coaches can check sizing before committing to a full team order. Every design goes through direct collaboration with a professional designer, with unlimited revisions until the mockup is approved.
For coaches planning an order, build in time for a sample check and sizing approval before finalizing team-wide sizes, and wash finished uniforms cold and inside out to protect the sublimated color over a full season.
Where to Learn More About Sublimation Printing
For deeper technical background, the Wikipedia entry on dye-sublimation printing and Mimaki’s process overview cover the science and equipment side well. For team-uniform specifics, browse Caprasport’s sportswear blog for ongoing design and care tips.
Why Beginners Overcomplicate the Sublimation Process
Most guides make sublimation sound more delicate than it is. The truth: it’s a mechanical process with four variables (temperature, time, pressure, and material) and beginners who fail usually skipped the pre-press step or never ran a test strip, not because the technology is finicky.
Where conventional advice falls short is treating every settings chart as gospel. A 400°F baseline is a starting point, not a law. Fabric weight, printer output, and even ambient humidity shift results, which is why practitioner-tested ranges like 385 to 400°F for jerseys exist alongside the wider general guideline.
If you take one thing from this guide, prioritize the pre-press and test-strip habit over memorizing exact numbers. Every defect covered above traces back to skipping one of those two steps. Get that discipline right, and the rest of the process is far more forgiving than most tutorials let on.
— Agha
Sources
- Dye-sublimation printing — Wikipedia
- Sublimation Printing: How It Works, Pros, and Cons (2025) – Shopify
- What Is Sublimation Printing and How Does it Work? – Printful
- Understanding the Dye Sublimation Process – Mimaki USA
FAQ
What Are the Steps for Sublimation Printing?
Prepare and mirror your artwork, print it onto sublimation transfer paper, pre-press the blank, align and tape the transfer in place, heat-press at the correct temperature and time, then peel while hot and inspect the result.
What Is the Sublimation Technique of Printing?
It’s a heat-transfer method where solid dye converts directly into a gas under heat and pressure, bonding permanently with polyester fibers or polymer-coated surfaces instead of sitting on top like ink or paint.
Can You Sublimate on Cotton or Dark Fabrics?
No. Sublimation dye needs polyester or a polymer coating to bond with, so cotton stays uncolored, and dark backgrounds hide whatever color does transfer since sublimation can’t print white.
What Temperature Should I Use for Sublimation Printing?
Most polyester blanks press well between 380 and 420°F, with 400°F as a common baseline; jersey-specific guides often recommend 385 to 400°F for about 55 to 65 seconds.
How Is Cut-and-Sew Sublimation Different From Heat-Press Sublimation?
Cut-and-sew prints flat fabric panels before assembly, allowing true seam-to-seam designs, while heat-press sublimation applies a transfer to an already-assembled garment, which can leave faint white lines at the seams.